

The Importance of Piece Activity in Rooks Endgames

Rooks Endgames: The initiative is a term we don’t get tired of repeating and it should already be very familiar to our readers.
To be in control, to take the game towards what you want, and force your opponent to stay alert all the time is something you should strive for in every game.
We have mostly talked about the initiative in the middlegame, but it is a concept you should keep in mind throughout the whole game, including the endgame – perhaps even more in the endgame, when tiredness also kicks in and it’s easier for the player who’s under pressure to make a bad move, which is usually enough to cash in on.
In this article, we are going to take a look at a recently played rook endgame.
Rooks Endgames – Part 1
The FIDE World Cup is offering great entertainment to chess lovers from all over the world these days. It has some very interesting games, including some instructive miniatures in the first rounds. But as the tournament advances and we see clashes between the top Grandmasters, the fight becomes even more intense.
A fun fact of the first games from the third round is that rook endgames appeared on most of the boards, giving the viewers a great masterclass of technical play. The example we’ve prepared from this round appeared in the clash between the American GM Wesley So and the Indian GM Santosh Vidit. The position we’re going to start from is completely equal and many of you will say that it’s just an easy draw.
We agree it should be a draw. But, white’s the one who is pressing all the time. And, thanks to his more active pieces he is all the time in control. The first important moment of the endgame we are interested in is here:
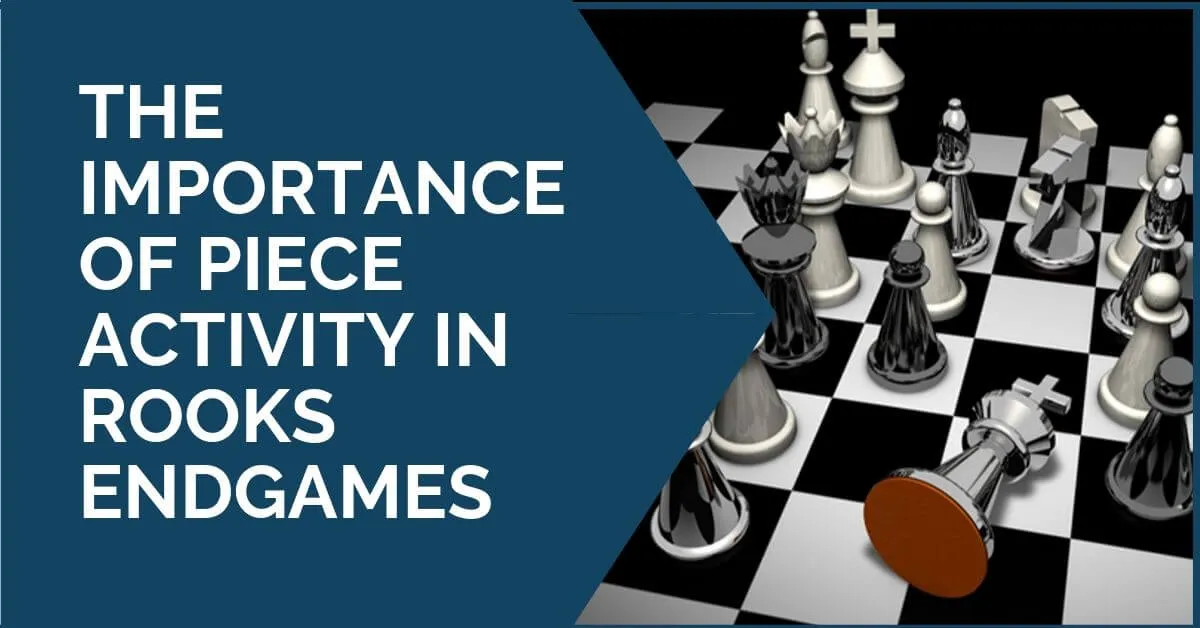
Wesley, So – Santosh, Vidit Khanty-Mansysk 2019
White to play
With an equal position, the first who manages to activate his pieces will have a better chance. This is the first thing Wesley So does in this position – improve the position of his rook. And, at the same time keeping the rival one slightly passive, forced to defend the a6, by placing it behind the pawn.
You can do this with maneuver 29. Rb8+ Kh7 30. Rb7 – keeping an eye on f7 as well – Kg6 31. Ra7. After this, he starts gaining space on the kingside by advancing the h pawn, and after black’s 33…g5 the following position is reached:
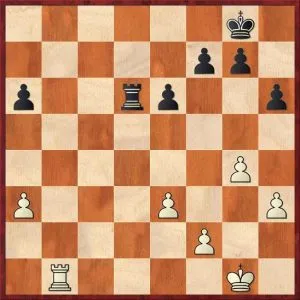
Rooks Endgames – Part 2
This is another moment in the game, as white continues to improve his position. The rook is active, and the king is also active. So, the following step is to fix the weakness on a6 by advancing his a-pawn to a5.
This plan creates a devious threat – a timely Rb7 followed by Rb6 transitioning into a winning endgame. Black has to keep alert and make sure he will be able to meet this idea at every moment with …Rc5.
Finally, white is ready to restrict black’s position some more by advancing his central pawn to e4 and, if black allows it, to e5. This didn’t happen in the game, as black played …e5 himself. But, after this move the d5 square became available for the rook, giving white new ideas to try and press for a win.
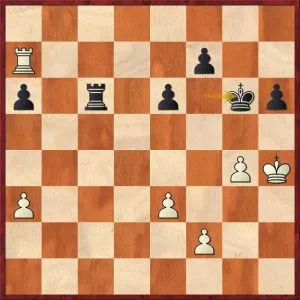
He eventually managed to do so, after a few mistakes from black, and you can see the full game below:
Conclusion
We have chosen to show this game because it is a great example of how easily your opponent can make mistakes when you play actively all the time and keep him/her in “check”.
With correct play, this endgame should have been a dead draw. But, even for a top player, it is not easy to have to defend for a long time.
Tiredness kicks in and mistakes can happen.
Looking for more on Rook Endgames? Look at 4 vs 3 on The Same Flank and 5 Tips to Improve Them.
We also recommend reviewing Initiative: 10 Reasons Why You Should Gain It in Your Games and Top 25 Chess Books: A Reply To Our Readers.


Comments: